Spring Boot Maven Plugin using the Azul Buildpack from Paketo Link to heading
It’s a great day to be a Spring Developer. This morning, my good friend Frank Delporte from Azul reached out with some questions about the Spring Boot Maven Plugin and the use of Azul Zulu JDK. It felt like a great opportunity to help out an amazing member of the community. At the end of the day, I spent some time creating a demo to help him out. I thought it would be a good idea to share it with you all as well.
Initializr-plusplus Link to heading
I do believe this is a great candidate for the Spring-CLI project, but for now, I have Initializr-plusplus a much simpler Spring Shell project that I use personally. Since I already had an option for using my multi-architecture buildpack it was a simple matter of copying and pasting with a couple of small edits. The resulting initializer-plusplus zulu-builder command is available in v0.0.34 of the project.
The Questions Link to heading
- How to switch from default
paketobuildpacks/buildertopaketobuildpacks/azul-zulu - How to add options to the JVM command line like
-Xlog:gc:gc.log - Can it be done
simply?
The Demo Link to heading
I can’t think of an easier way to switch between buildpacks than using the initializer-plusplus project. Creating a Spring Shell CLI to manage Maven pom files or other project features, consistently, feels like a cheat code.
In the demo, I switch to the Azul Zulu JDK for the entire demo, even though it isn’t required, because the JDK is included in the buildpack. I tried to make things pretty and showed the java -version output before creating the Spring Boot project.
I used curl to create the Spring Boot project and added dependencies for web and actuator in order to get a simple project that is easy to test. Of course, I also select Java 17 as the JDK version.
I run the git init command to initialize a new git repository. With that, I can easily show the import diff that I’m generating with the initializer-plusplus zulu-builder command. I show the new section of the pom.xml and move on to creating the image with the Spring Boot Maven Plugin.
Building the Image Link to heading
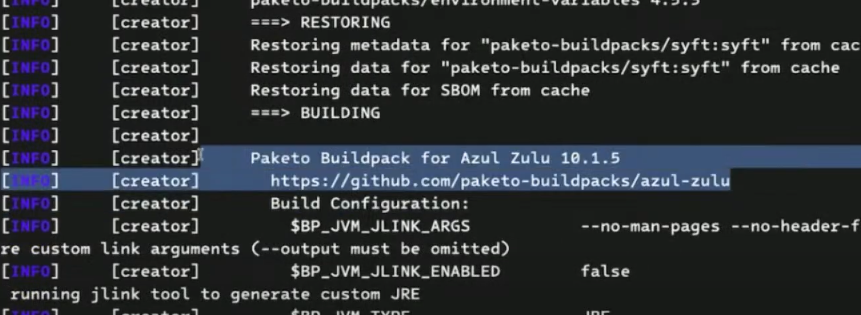
Our mission is accomplished once the Zulu build pack is incorporated. As long as we put the Azul Zulu buildpack in front of the Java buildpack, we will get the Azul Zulu buildpack instead of the default Liberica version. The image is built successfully, and we pull in all other stuff from the Java build pack.
Running and Validating the Image Link to heading
The demo image is run after assigning a unique name to it and exposing Port 8080. I verify the image’s status and validate the endpoint’s health. A thorough check inside the image confirms the inclusion of the ‘GC log’ command, one of the options chosen for the demo.
Wrapping Up the Demo Link to heading
The entire process concludes with a peek into the GC log. And voila! We’ve accomplished our mission. The entire process was wrapped up in less than 5 minutes, and all the steps were integrated into a repository for you to experiment and tweak as you please.
Afterthoughts and Tips Link to heading
An important concept I wish to emphasize is the flexibility in switching between the buildpacks. It’s essential to acknowledge that not all tasks need to follow the same path to production. It is prudent to evaluate as different workloads may have varying requirements, and different JVMs might perform better or worse.
So, don’t hesitate to put in those 5 minutes to conduct an experiment. Validate your assumptions by testing if an application benefits from using a different JVM or a different garbage collection method. After all, we’re dealing with applications that could potentially go into production hundreds or even thousands of times.